
Create This Stunning Piece of Dichroic Glass Wearable Art
Follow this fun & easy tutorial to discover an interesting technique for joining beads to chain for an invisible seam!
Hello there my fellow beaders!
Ready to learn a fun and fast technique in bead chain making?
Whether you’re a crafting newbie or a seasoned pro, this tutorial is your ticket to learning something new. With these tis, you’ll see just how easy and fun it is to create jewelry that you can wear with pride. Let’s dive into the wonderful world of beading from home, now made incredibly easy with our new Handmade Glass Jewelry Kits!
Paula Radke
Glass Artist
P.S. I’ve got step-by-step photos to guide you, so grab your kit, crank up your favorite tunes, and let’s get crafting!
Grab Your Kit
For limited time only, this kit available to newsletter subscribers at 20% savings.

What’s In Your Beading Treasure Chest?
Tools & Components You’ll Need
Here’s what you’ll find in your bead kit:
20 dazzling glass beads
25 five-inch pieces of 22-gauge copper wire
36 inches of copper link chain
Two jewelers’ pliers – Not included in kit.
One wire cutter – Not included in kit.
Step 1: Start Stringing Your Beads
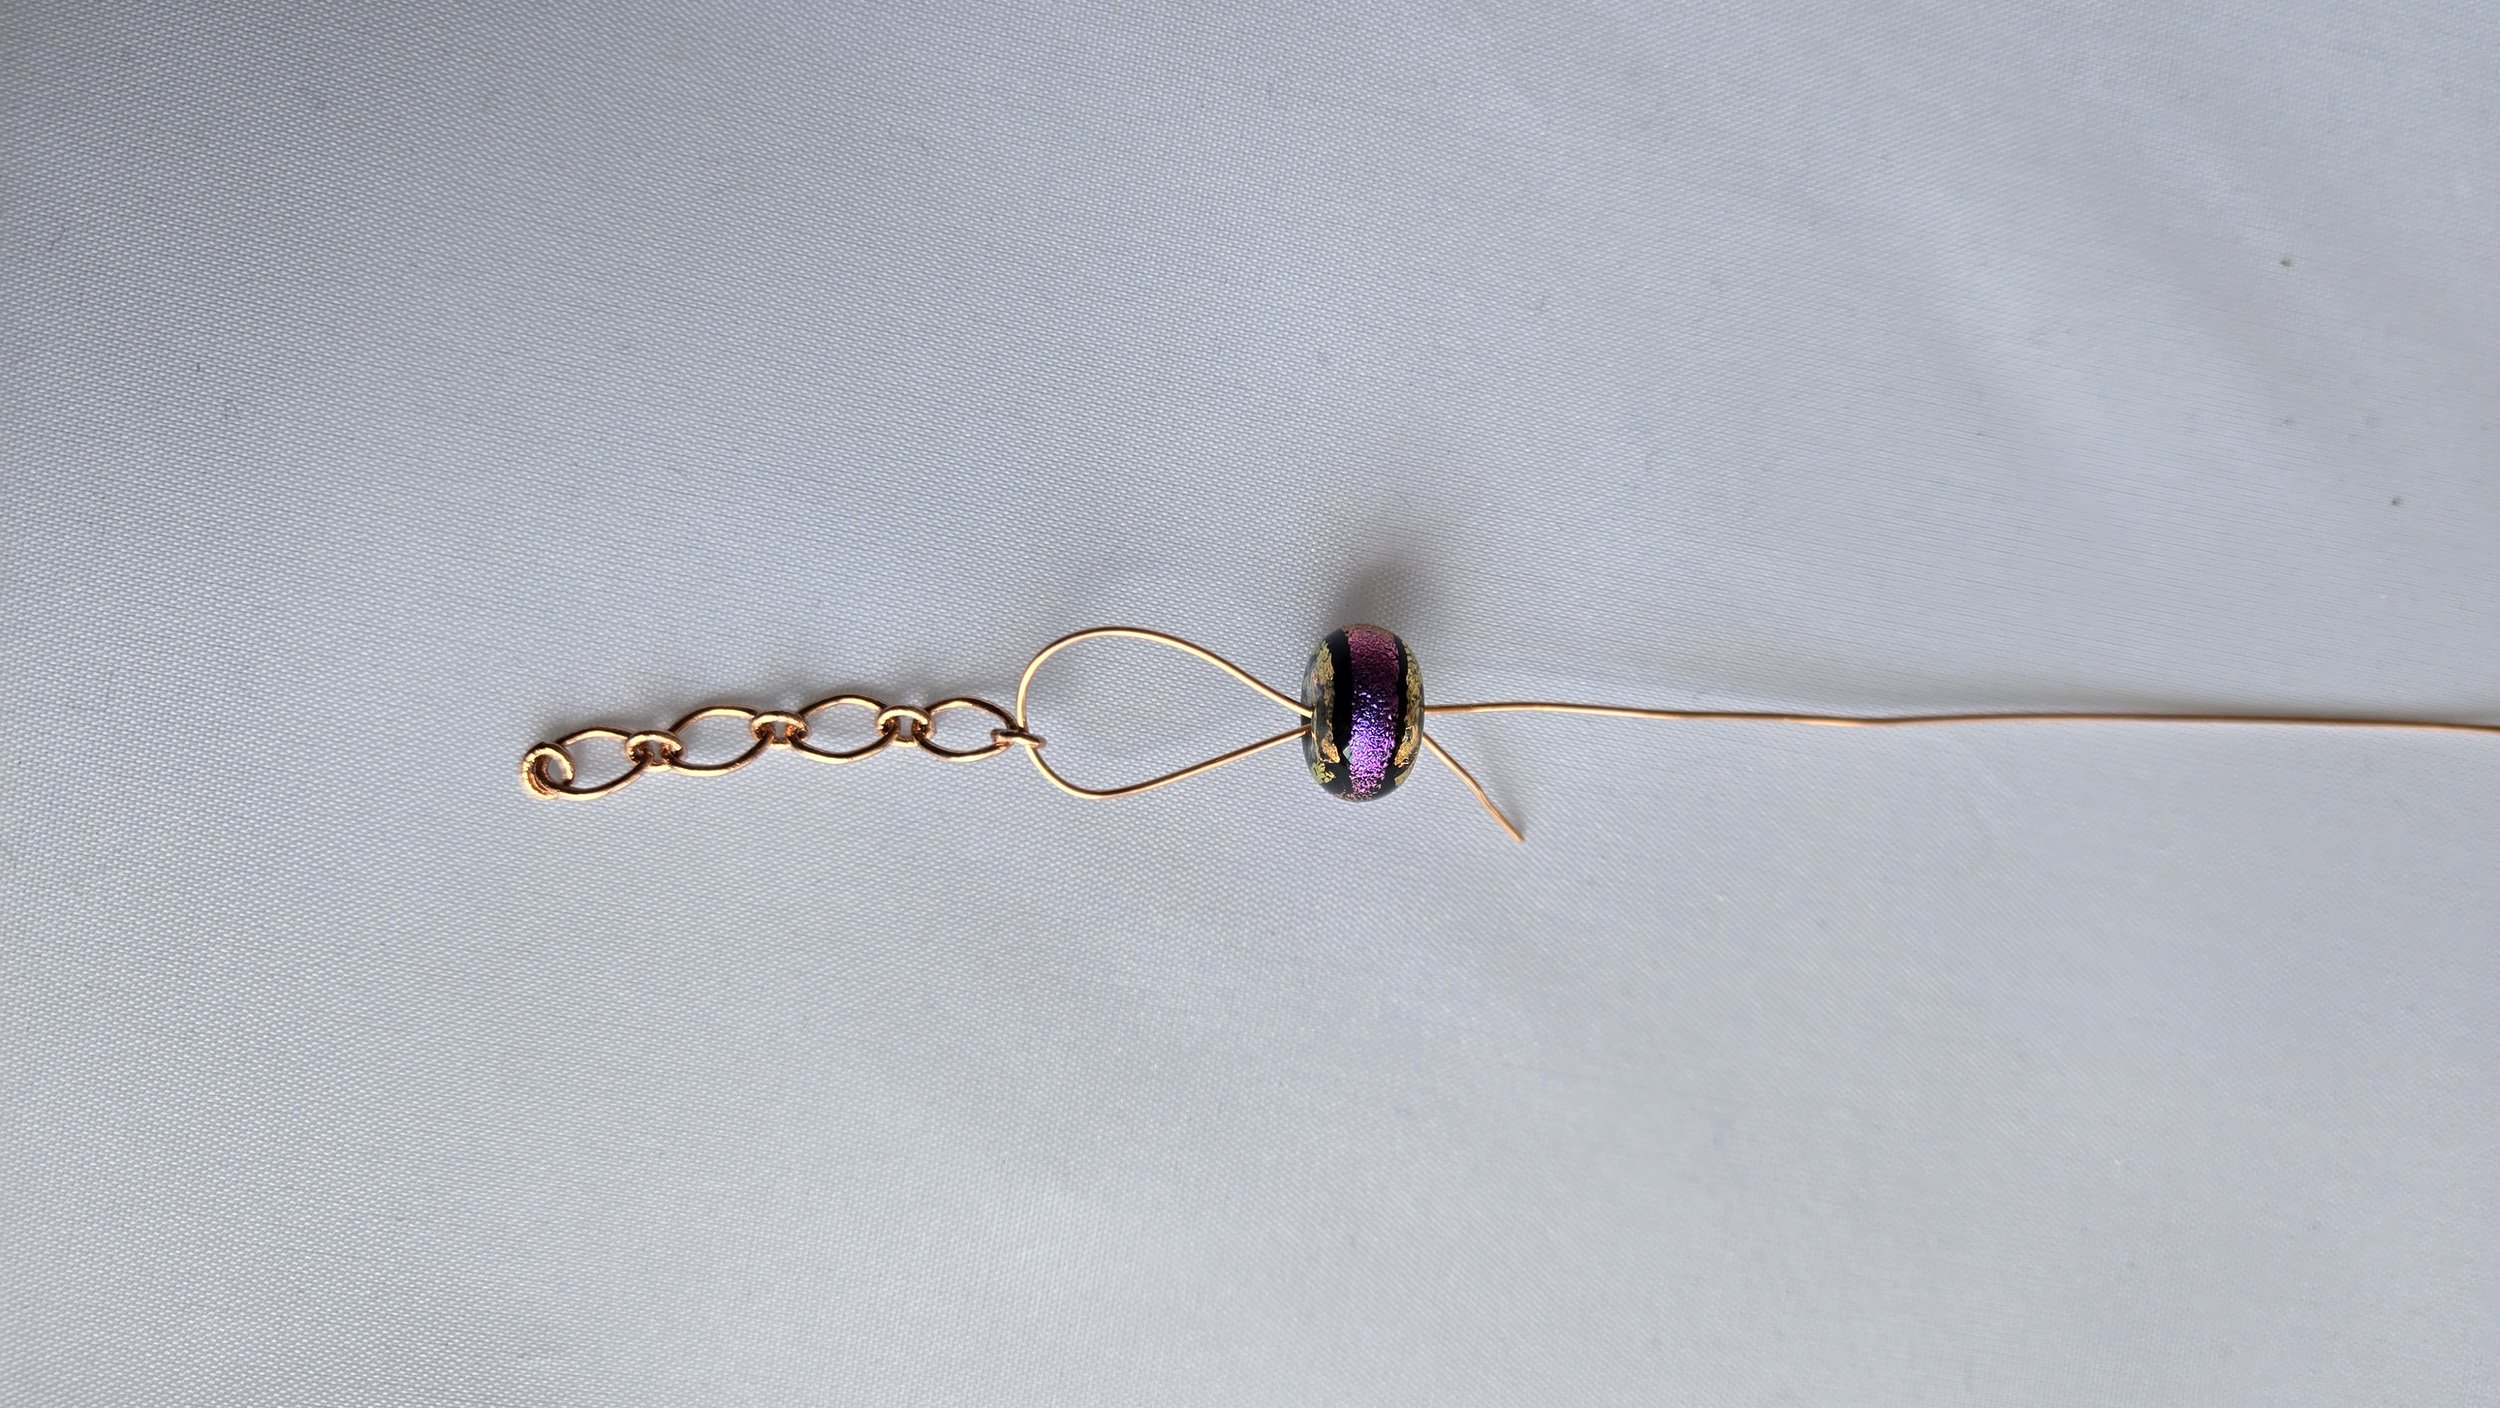
Let’s kick things off with a single bead and a piece of copper wire. Slide that 22-gauge wire through your bead like you’re threading a needle. Now, grab a piece of copper chain and loop the wire through it, then guide the wire back through the bead in the opposite direction.
Don’t miss this part: leave a little “tail” on the wire (at least an inch long). Why? You’ll see why in a sec! Oh, and be gentle with that wire! You don’t want any unsightly kinks ruining our final product.
Beading Hack: If your wire gets a bit cranky, gently smooth it out with your fingers.
Step 2: Double the Fun
Think Mirror – Repeat on the Other Side
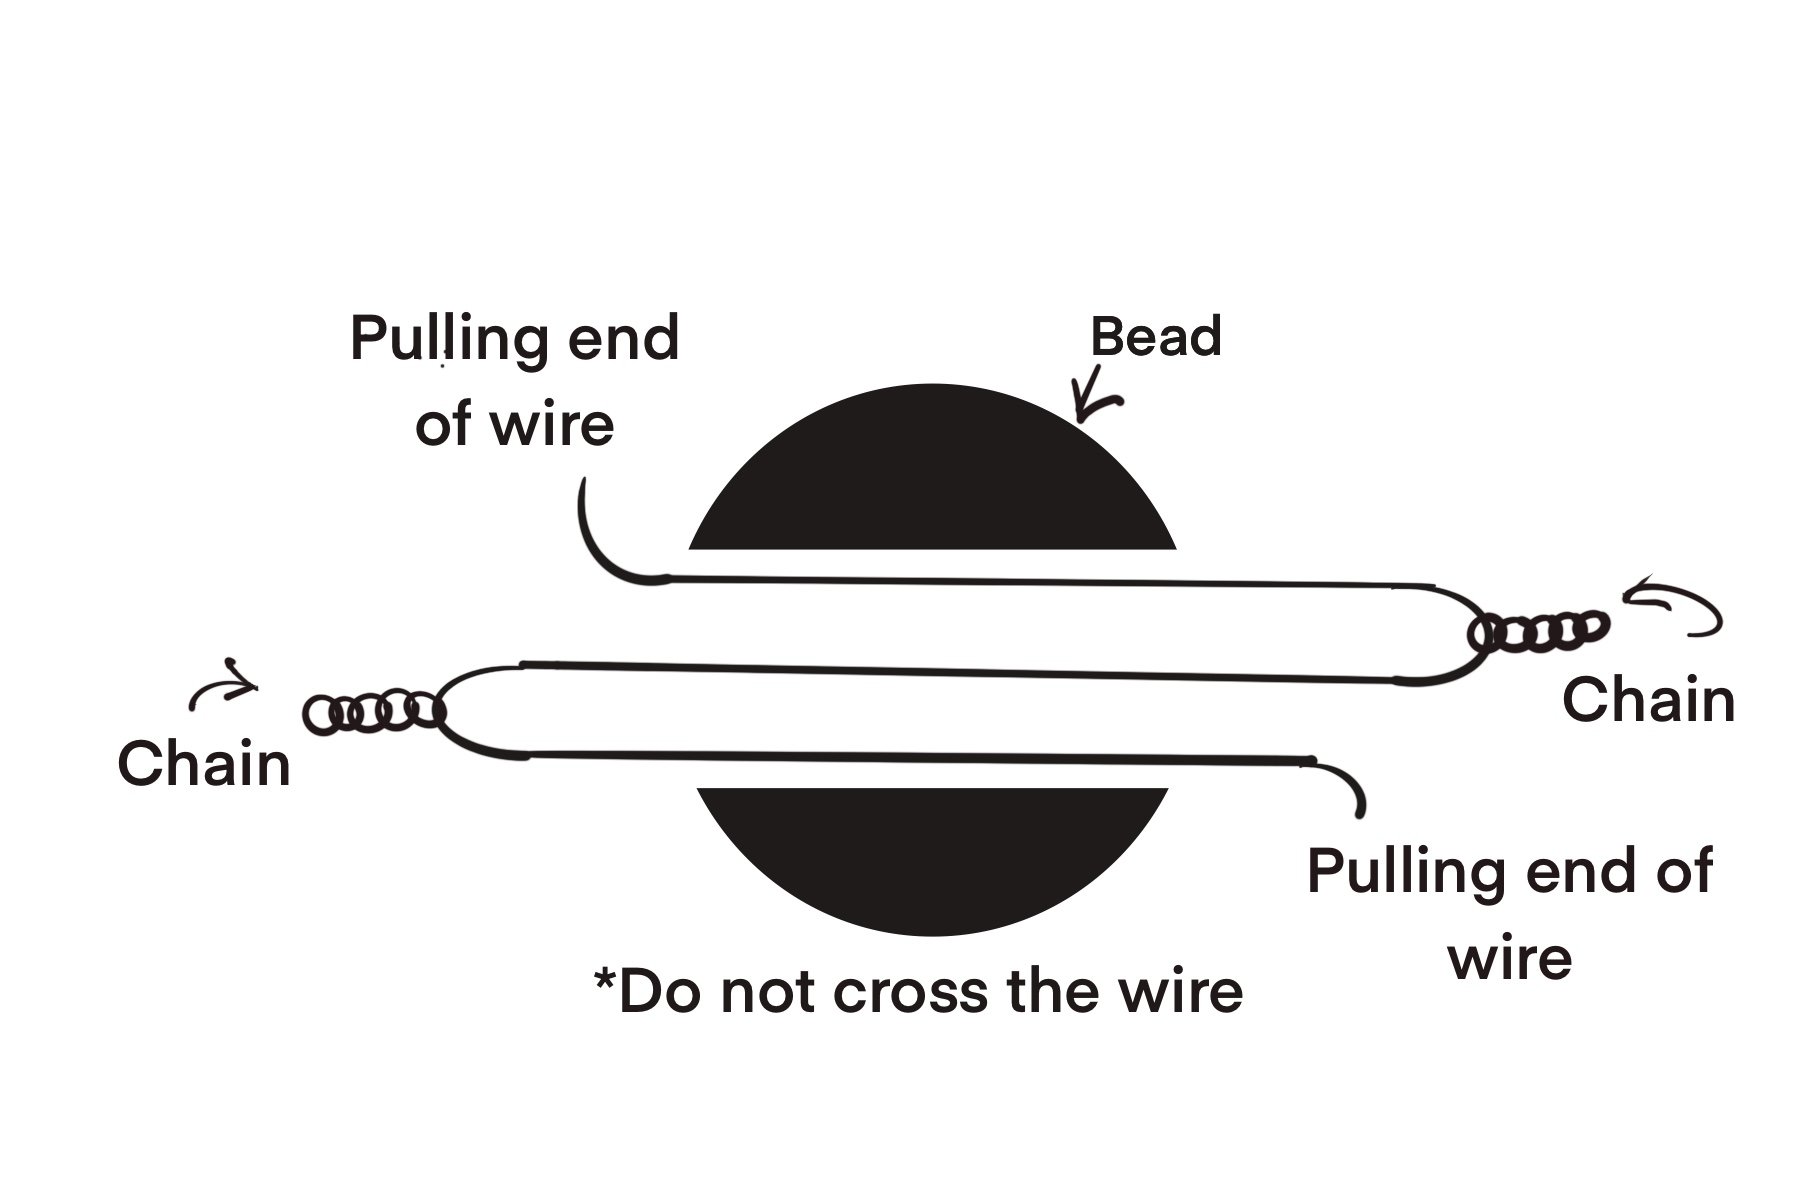
Now, let’s do the same thing on the other side of the bead. Don’t worry, it’s double the fun! Thread another piece of wire through, add the chain, and loop it back through the bead. Keep those wires straight and untangled inside the bead – crossed wires will be difficult to pull through the bead.
If you notice crossed wires (like I did in my photo – oops!), no worries! Just flip the loop so the wire entering the bead is nice and tidy. Grab your needle-nose pliers and give it a gentle nudge. You’ve got this!

How it Should Appear
A side-by-side shot of the bead with wires and chain on both sides, highlighting the “oops” crossed wire and the fixed version.
Step 3: Pull It Tight & Snip with Precision
Time to bring it all together! Grab the two wire “bows” you’ve created around your bead and pull them firmly until the chain hugs the bead snugly. You want that chain to look like it’s giving your bead a cozy embrace.
Carefully trim the wire ends as close to the chain as possible – but watch out for the chain! I’ve included 5 extra wire pieces in your kit because, let’s be real, we all snip too close sometimes. Practice makes perfect.

Step 4: Show Off Your Creations with Pride!
Beading isn’t just about making pretty things – it’s about unleashing your creativity, relaxing with a fun project, and showing off your style. My goal with this newsletter is to share my best techniques for making glass art. You’re not just making jewelry; you’re creating memories. And now, with my new Handmade Glass Jewelry Kits, you can dive right in. So, experiment, mix up those beads, do it with your friends and don’t be afraid to add your own flair.
Got questions or want to share your beading masterpiece? Tag me on social media or reply to this email – I’m dying to see your creations!
Ready for more beading adventures? Shop our full range of glass bead kits at paularadke.com and keep the sparkle alive!

Thank you for shopping local!
Visit the website to view Paula’s Collection of one-of-a-kind dichroic beads and jewelry.
Your purchase will be assembled with love, packaged, and shipped by Paula in her studio in Morro Bay, California.